Author(s): Naveen Muppa
Continuous Integration/Continuous Delivery (CI/CD) has become a cornerstone of modern software development, enabling teams to deliver high-quality
applications at speed and scale. Informatica Intelligent Cloud Services (IICS) provides a robust platform for data integration and management in the cloud.
This abstract explores the implementation of CI/CD practices within IICS, focusing on streamlining the development, testing, and deployment of data
integration.
Azure DevOps is a solution provided by Microsoft that includes Version Control, Reporting, Requirements Management, automated builds, testing, and release management features. The goal provided by the solution is to cover the full product lifecycle and provide Dev Ops practices to an organization. On the version control side, both Git and Team Foundation Version Control (TFVC) could be deployed.
To utilize DevOps for IICS, a project should be set up and it should include a git-based repository as seen in the following screenshot.
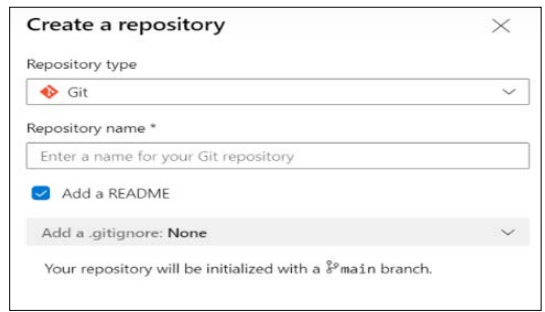
Figure 1: Repository
Additionally, after a repository has been created, setting up user accounts with the correct permissions on the repository is important. By default, DevOps has premade groups to help manage permissions. Permissions could be managed on a branch level of a repository if that level of control is needed. The menu could be found by navigating to the settings for the project and picking the Repositories option.
An example of this menu is as follows:
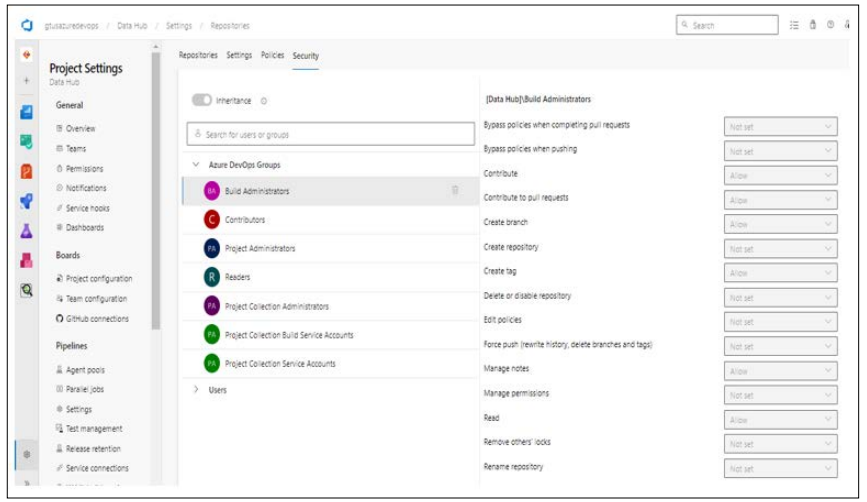
Figure 2: Repository
After the project and repository are set up, the setup in IICS is very similar to within GitHub as follows:
Edit icon is on the top right side. One can see the option Allow Push to GIT. Enable this only in development org and make sure to disable this option from nondevelopment orgs.
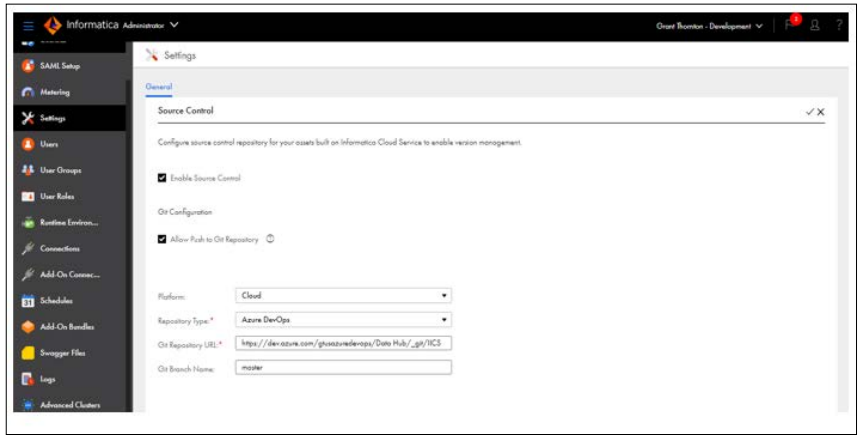
Figure 3: Setup
Figure 4: Source Control
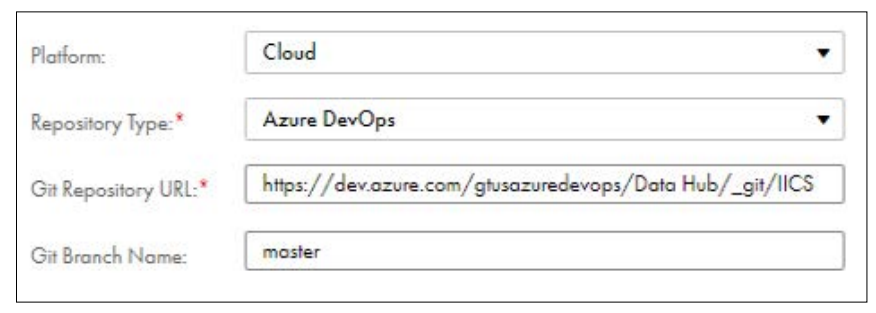
Figure 5: Git
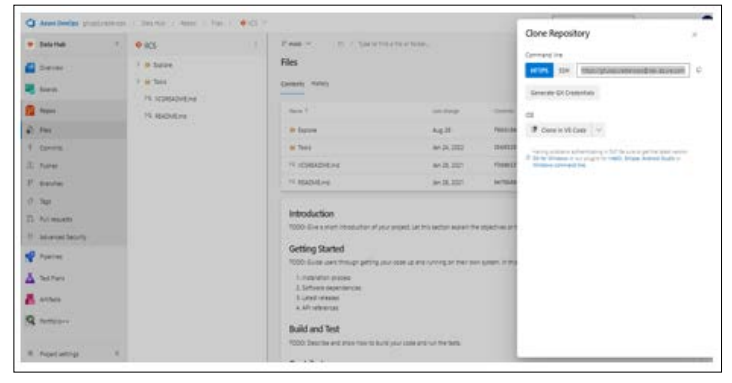
Figure 6: Clone
Given the limitations of the Informatica CLI, we’ve decided to diverge from conventional branching strategies. Our approach involves managing two separate repositories:
Note: The limitations, we can’t store both source code and artifacts in the same repository. For that we introduced separate IICS Artifacts Repository, which houses Delta versions of our export code.
After getting the IICS setup to utilize the DevOps repository, you would be able to check-in and check-out like you would with a GitHub source control setup. You would also see the usual ability to Pull from Git. From an IICS standpoint, it would work similarly to how it would within GitHub.
On the DevOps side, it would use the Informatica username for the commits and recreate the IICS folder structure. In the following image, you see the folder structure setup and a list of objects that make up the metadata of the objects in the IICS Repository.
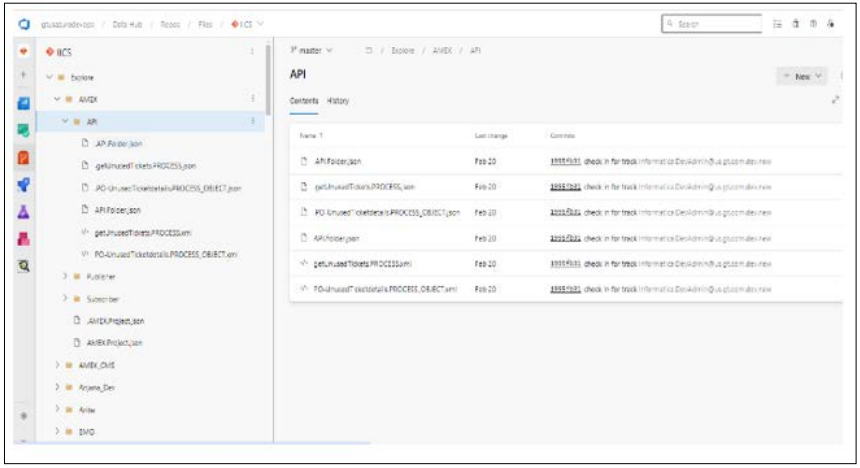
Figure 7: Metadata dropdown menu and select Settings.
CI/CD, or continuous integration and continuous delivery, is a practice that automates the integration and delivery operations in a CI/CD pipeline. You can automate each integration and delivery operation using the Data Integration Service REST API or the infacmd command line programs.
A CI/CD pipeline includes the integration operations that developers use to design objects and the delivery operations that deliver the objects to the production environment. You can use the REST API or infacmd to automate integration and delivery in the following ways:
Deploy and test every change that a developer makes to an object. Developers receive instant feedback about whether objects pass or fail testing and the types of changes that objects require.
Deliver objects that pass testing to the production environment. Based on organizational requirements, you can deliver objects to additional requirements, such as QA and UAT, before delivering the objects to the production environment.
Continuous integration and continuous delivery are fully logged and visible to the entire team so that team members can allocate time away from manual tasks.
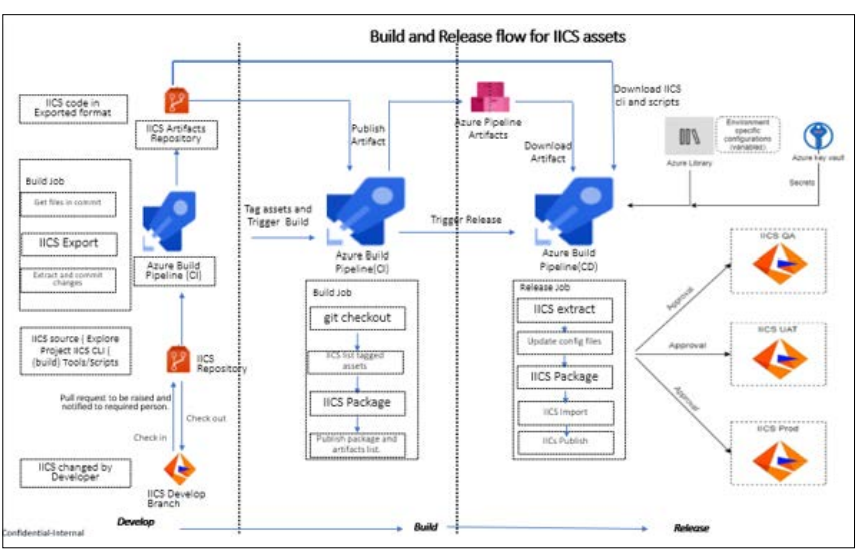
Figure 8: IICS Build Pipelines
Unlike any programming language, compilation of code is not required here.
Developer will commit the IICS code from Dev environment to Azure repo (Master branch) in IICS.
As we cannot use this committed code for packaging due to IICS CLI limitation, a build is setup to maintain the exported format of IICS code in another repo.
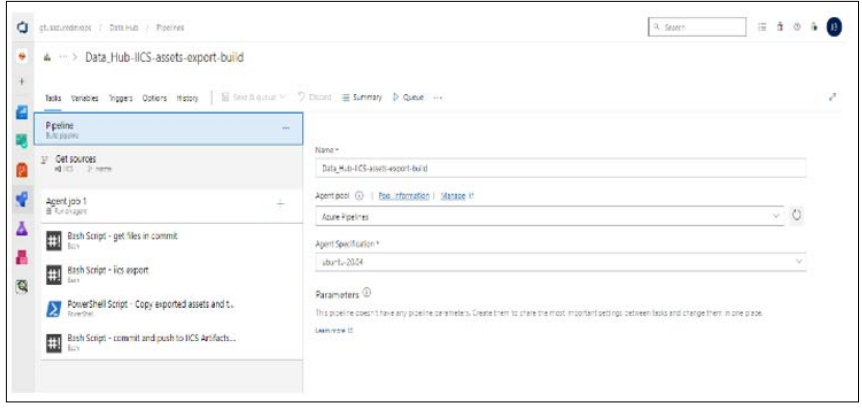
Figure 9: IICS Repo Structure
Once these dependent objects are in place in target environment, we can use release pipeline for deploying the assets. The release pipeline consists of the steps below.
In conclusion, adopting CI/CD for Informatica Intelligent Cloud Services empowers organizations to accelerate the delivery of data integration solutions, improve collaboration among development teams, and enhance the overall efficiency and reliability of data pipelines. By following best practices and continuously refining CI/CD processes, organizations can maximize the value derived from their investment in IICS [1-5].